This article provides a comprehensive guide on setting up and using the MetaMask wallet on a smartphone. It covers the wallet’s key features, its history, installation process, and usage in a mobile app. Additionally, we will discuss how to add and receive tokens, connect to decentralized exchanges like PancakeSwap, and methods to secure your wallet.
What is MetaMask?
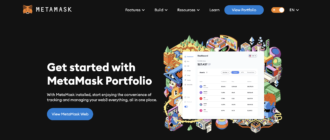
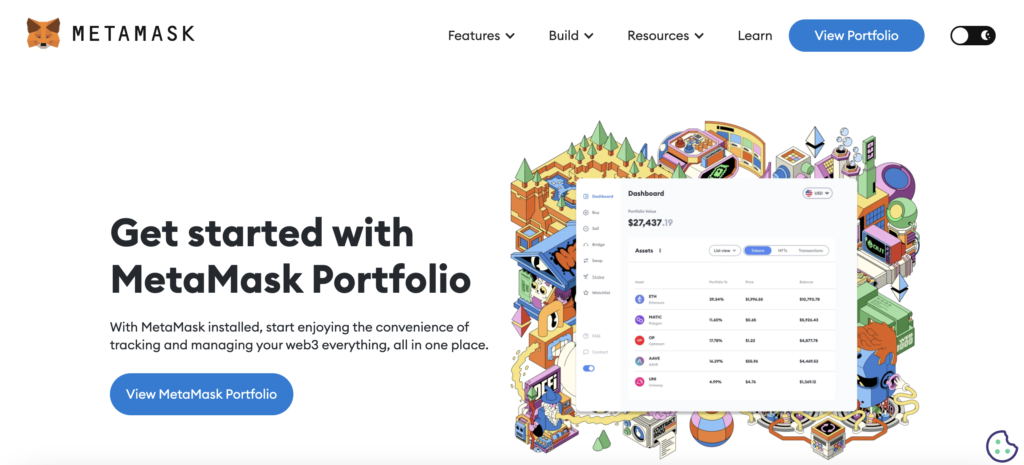
MetaMask is a cryptocurrency wallet that enables users to manage Ethereum, ERC-20 tokens, and other cryptocurrencies that support the Ethereum Virtual Machine (EVM). Available as both a mobile app and a browser extension, MetaMask facilitates interactions with decentralized applications (dApps) directly through its web interface. For more information, visit the official website at MetaMask and its official DEX at MetaMask Portfolio.
The History of MetaMask
Developed by ConsenSys in 2016, MetaMask was designed to provide easier access to the Ethereum network and its applications. It has since become one of the most popular tools within the Ethereum ecosystem.
Browser Extension
While this article focuses on the smartphone version, MetaMask also offers a browser extension that allows users to interact securely with the Ethereum network directly from their web browsers. This extension is available for download in official extension stores for browsers like Chrome, Firefox, Brave, and Edge. By installing the extension, users can manage their accounts, store and send Ethereum and other ERC-20 tokens, and use dApps without needing additional software.
Downloading MetaMask
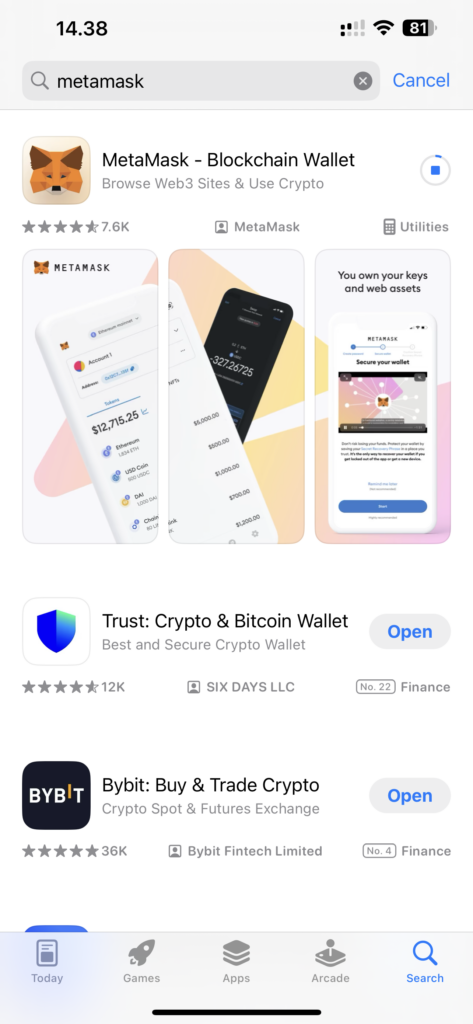
You can download the MetaMask wallet from your smartphone’s app store—Google Play for Android devices or the App Store for iOS. Simply search for “MetaMask” and follow the installation instructions.
Installing MetaMask
The installation of the MetaMask wallet begins by downloading the official app from Google Play for Android or the App Store for iOS. It’s crucial to ensure that the app is downloaded from a reliable source to avoid the risks associated with counterfeit software.
Upon installing the app on your smartphone, you’ll be presented with the option to either create a new wallet or import an existing one. If you opt to create a new wallet, MetaMask will prompt you to generate a new secret phrase (seed phrase), consisting of 12 randomly generated words. This phrase is vital for recovering your wallet on any device, so it’s important to store it in a secure and reliable place.
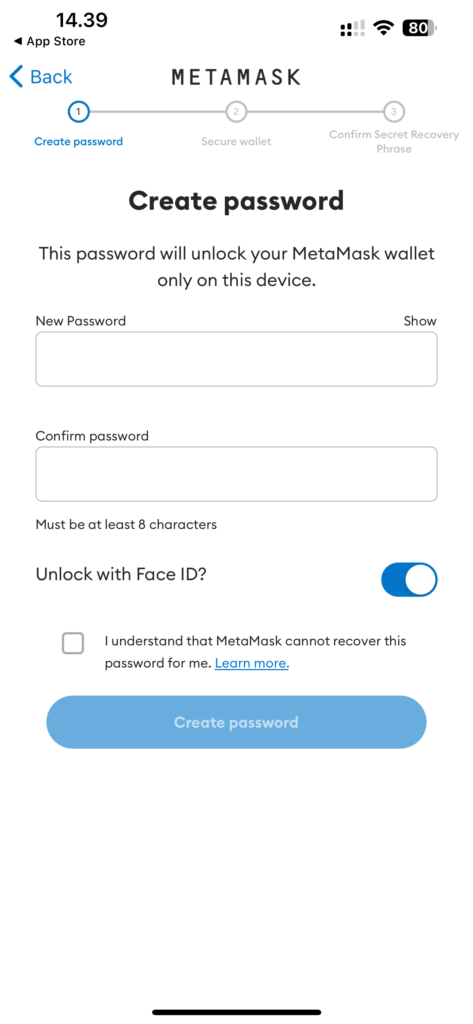
Next, the app will ask you to set a password to access the app on your device. This password adds an extra layer of security, as it is required every time you open the app or sign transactions.
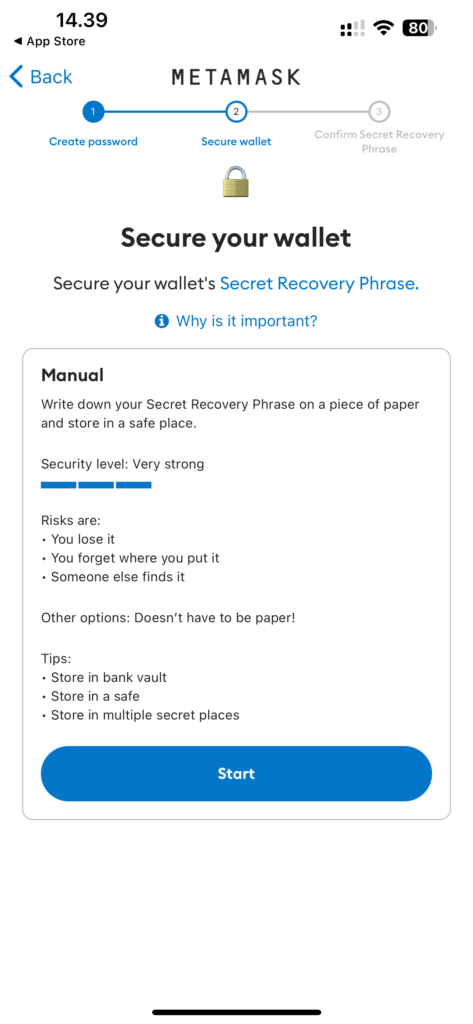
After setting up your secret phrase and password, MetaMask will suggest making a backup of the secret phrase. This is a critical step, as losing the phrase could result in being unable to access your assets in the wallet. MetaMask also provides recommendations for securely storing the phrase, including avoiding digital storage or disclosure to third parties.
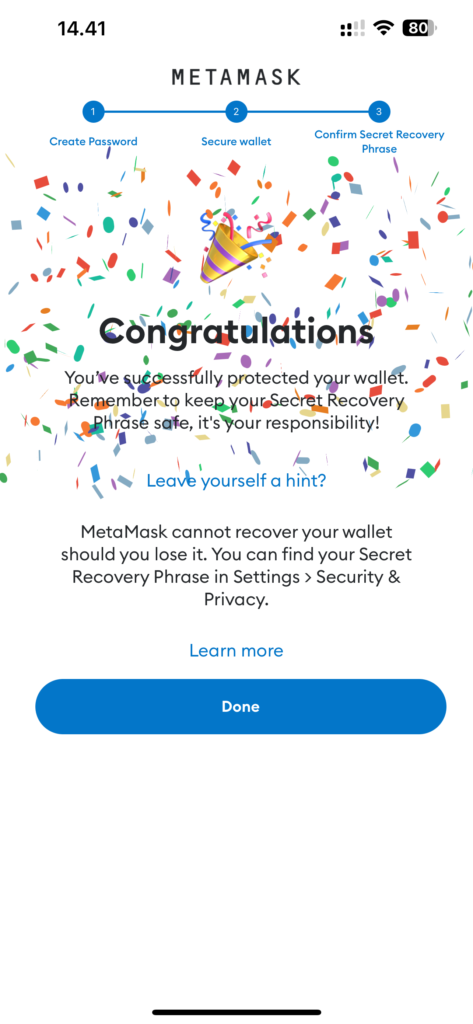
In conclusion, installing MetaMask is not only straightforward but also involves several key steps to ensure the security of your assets and personal finance management. This makes the installation process not just mechanical but a conscious choice for security and control over your finances.
How to Add Coins and Tokens to MetaMask
Adding coins and tokens to MetaMask is an essential process for managing your cryptocurrency assets. After installing and setting up the MetaMask wallet, users can add tokens to track their balances and conduct transactions. Let’s go through the steps to add a token, using USDT as an example.
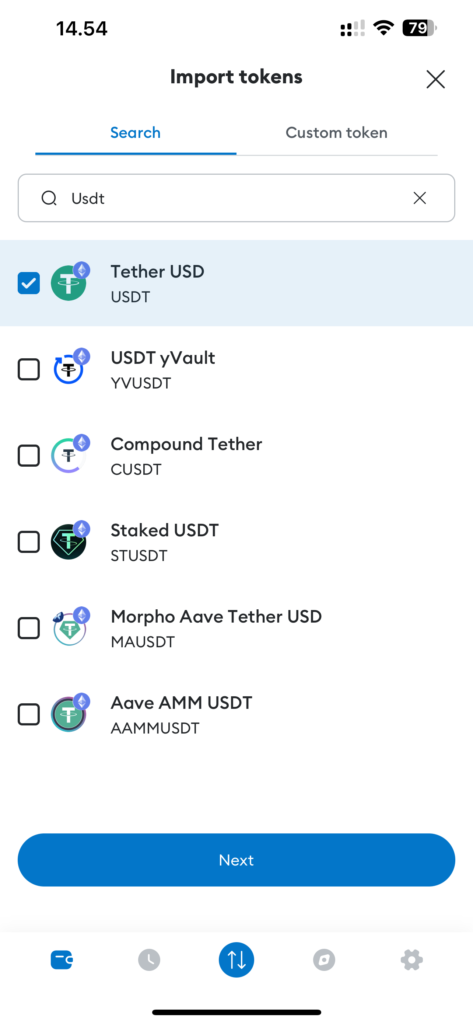
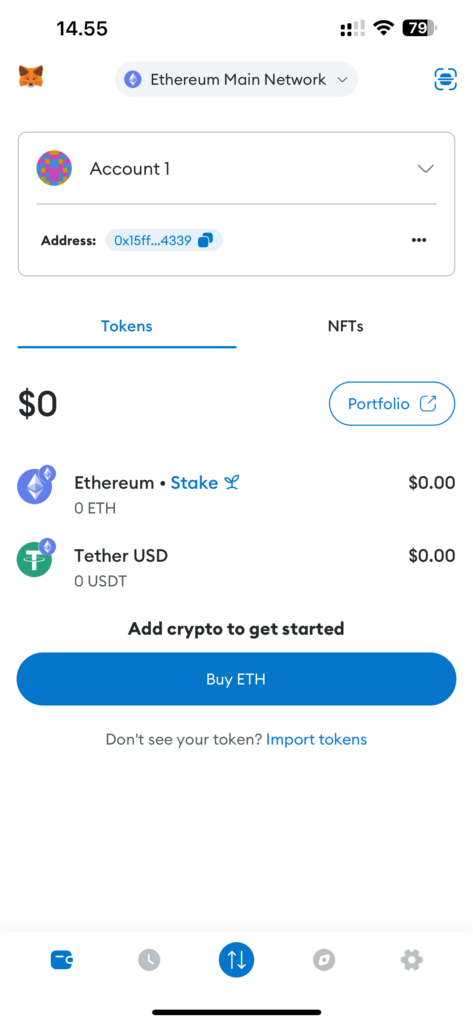
Begin by opening the “Tokens” tab in the MetaMask app, which is located in the main interface. Here, you’ll see a list of any tokens already added.
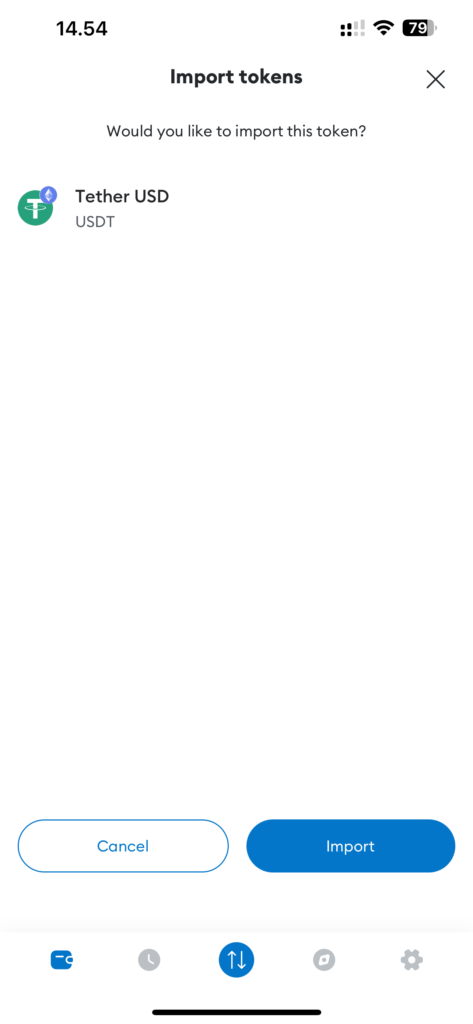
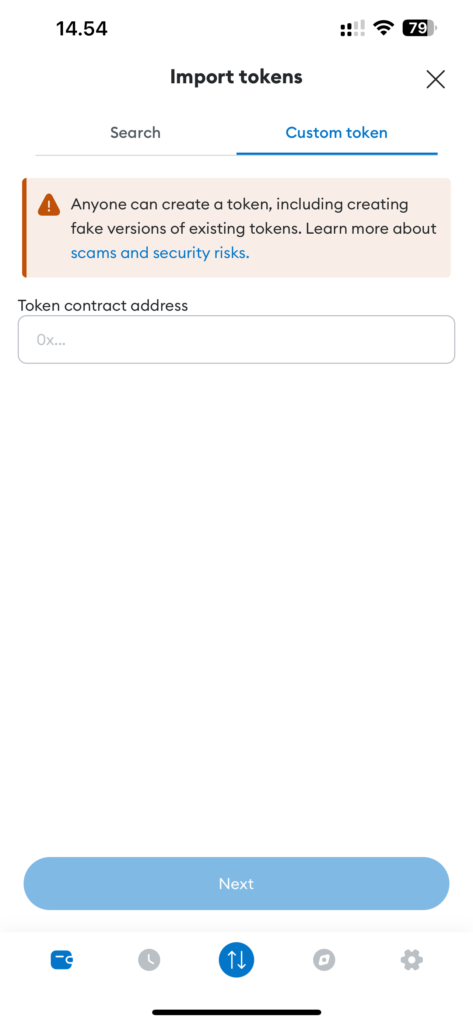
To add a new token, click on the “IMPORT” button. A window will appear with two tabs: “Search” and “Custom Token.”
On the “Search” tab, you can select from a list of popular tokens. If the token is not listed, switch to the “Custom Token” tab.
Adding a Custom Token
On the “Custom Token” tab, you will need to enter the contract address of the token you wish to add. A contract address is a unique identifier that links the token to its smart contract on the blockchain. These addresses can be found on platforms such as Etherscan for Ethereum tokens or BscScan for tokens on the BNB Smart Chain.
After entering the contract address, MetaMask will automatically retrieve other necessary information about the token, such as its symbol and decimals (i.e., the number of digits after the decimal point that the token supports). This information is essential for the correct display of the balance in your wallet.
You can now easily manage this token—send and receive it, and use it in decentralized applications (dApps) that support MetaMask.
Adding the BNB Smart Chain Network to MetaMask
To add the BNB Smart Chain (formerly known as Binance Smart Chain) to your MetaMask wallet, follow these steps to configure the network for accessing tokens and decentralized applications (DApps) on this blockchain platform:
- Open MetaMask: Launch the MetaMask app or browser extension and enter your password to access your wallet.
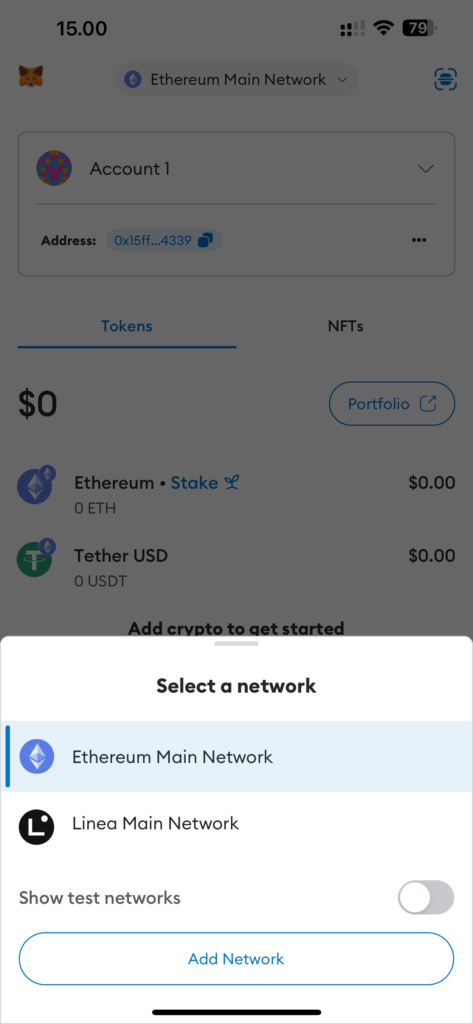
- Network Settings Access: Click the network list at the top to open the menu. Then select “Add Network” and go to the “Popular” or “Custom Networks” section.
- Add a New Network: Choose a network from the list of popular ones or add a network manually.
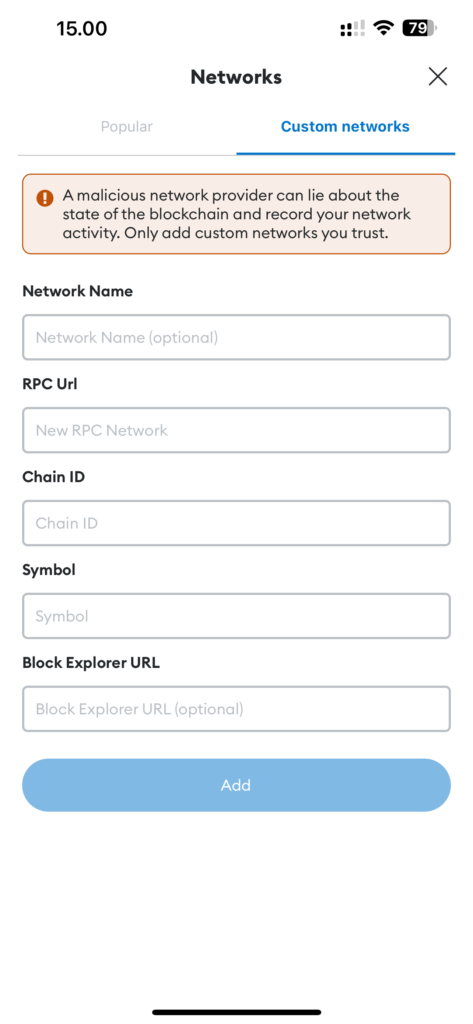
- Enter BSC Network Parameters: Enter the following details for the BNB Smart Chain:
- Network Name: BNB Smart Chain
- New RPC URL:
https://bsc-dataseed1.binance.org/ - Chain ID:
0x38(or 56, if 0x38 does not work) - Symbol: BNB
- Block Explorer URL:
https://bscscan.com
Save and Connect: After entering all the details, click the “Confirm” or “Save” button. MetaMask will automatically connect to the added BNB Smart Chain network.
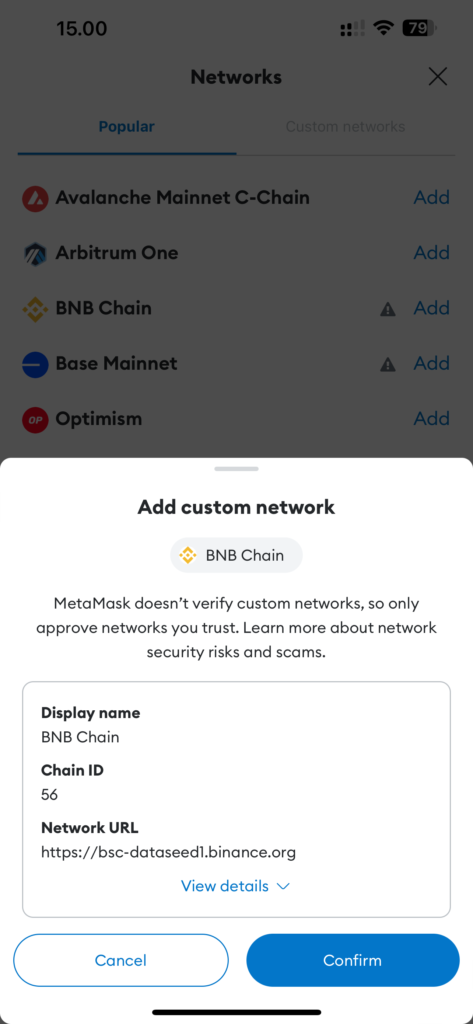
Following these steps, your MetaMask will be set up to use the BNB Smart Chain, enabling you to manage BNB and other tokens on this network and interact with DApps deployed on BSC.
How to Receive Coins and Tokens in MetaMask
Receiving coins and tokens in your MetaMask wallet involves using your unique public wallet address. This address acts as your cryptocurrency account number.
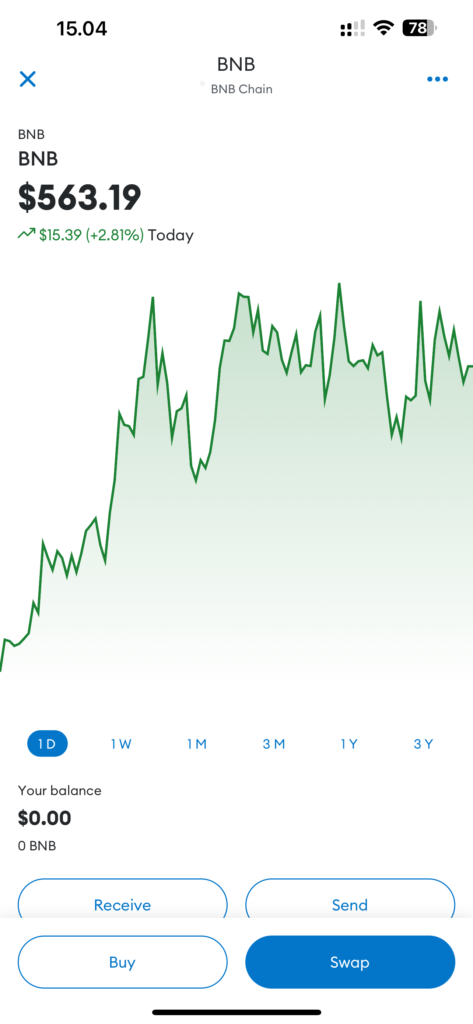
To find your public address in MetaMask, open the app and click on the wallet name at the top of the interface. You can copy this address to the clipboard by clicking the adjacent copy icon.
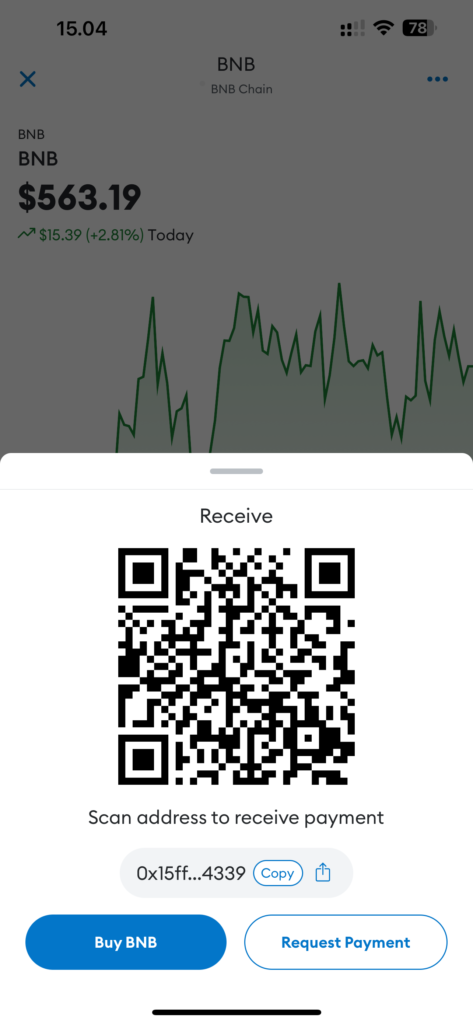
Your public address can be used to receive coins, tokens, or NFTs on supported networks. Provide this address to the sender, or enter it in the withdrawal form on an exchange or other cryptocurrency service where you hold funds. It’s crucial to ensure the address is entered correctly, as blockchain transactions are irreversible and sending to an incorrect address will result in a loss of funds.
Connecting MetaMask to a Decentralized Exchange (DEX)
Connecting your MetaMask wallet to a decentralized exchange (DEX) allows you to perform cryptocurrency transactions directly through your browser, providing direct access to trading and other financial tools without transferring your funds to a third party. The connection process may vary slightly depending on the specific DEX platform, but the general steps are similar.
Before connecting to a DEX, ensure that MetaMask is set to the correct blockchain network used by the exchange. For example, use the Ethereum network for Uniswap and the BNB Smart Chain for Pancakeswap.finance.
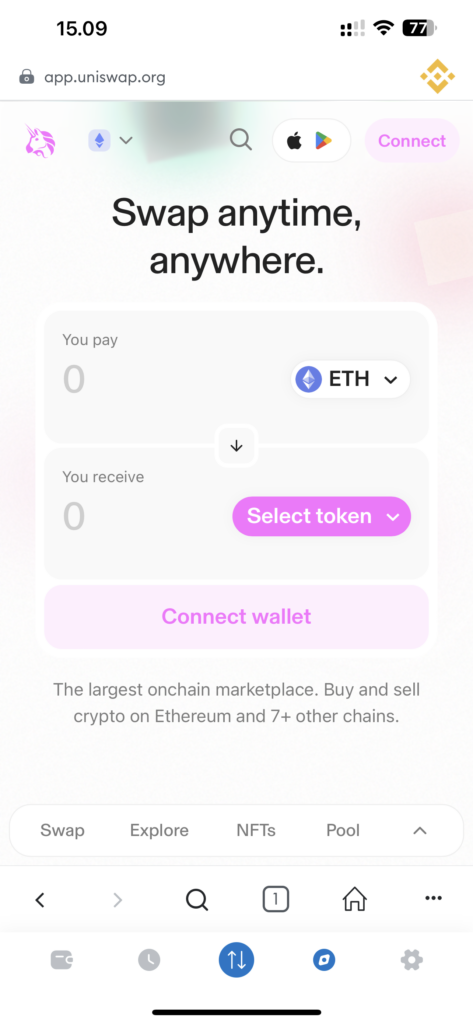
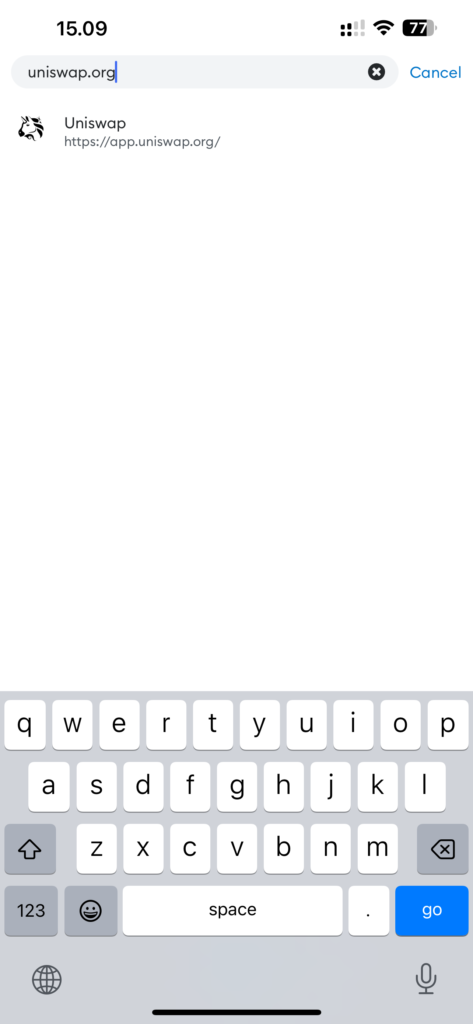
Open your web browser and navigate to the address of the desired decentralized exchange, such as uniswap.org for Uniswap or sushiswap.org for SushiSwap. Make sure you are on the official site to avoid phishing attacks.
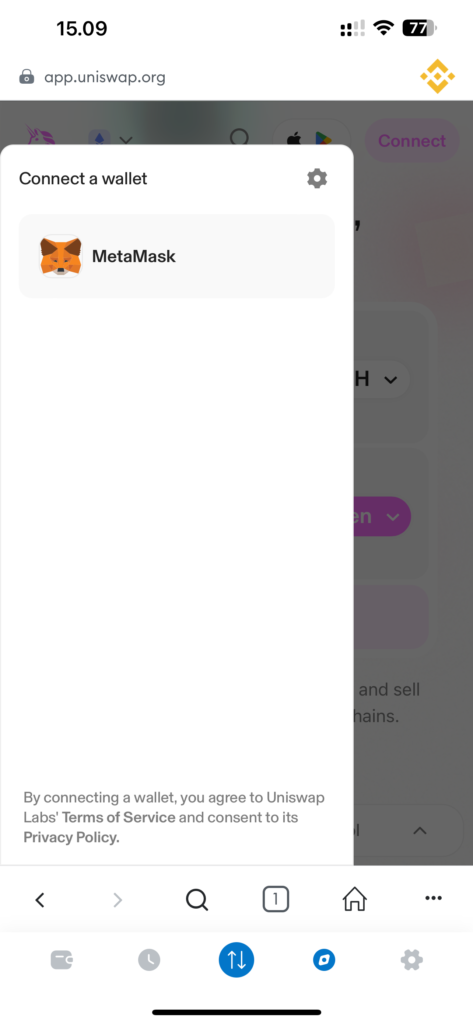
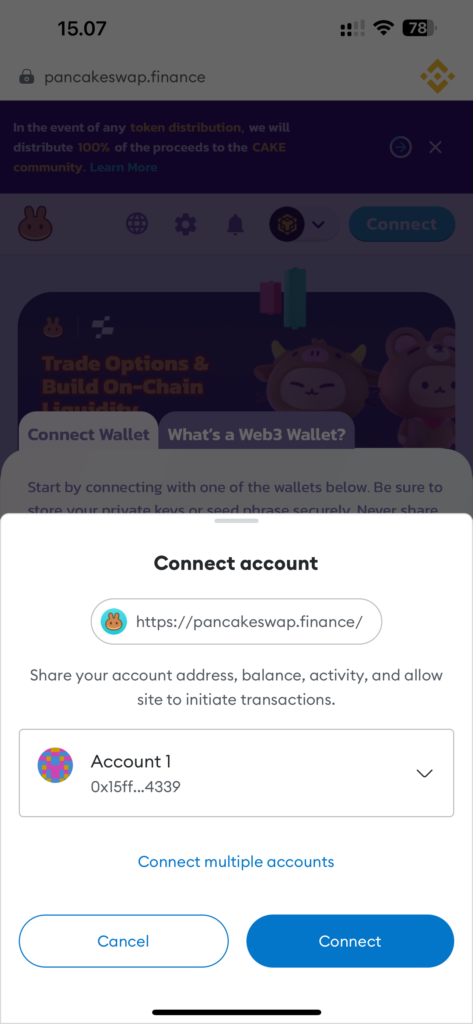
On the DEX’s main page, find and click the “Connect Wallet” button. In the list that appears, select MetaMask. You may need to confirm the connection by clicking on a prompt that appears in the MetaMask extension.
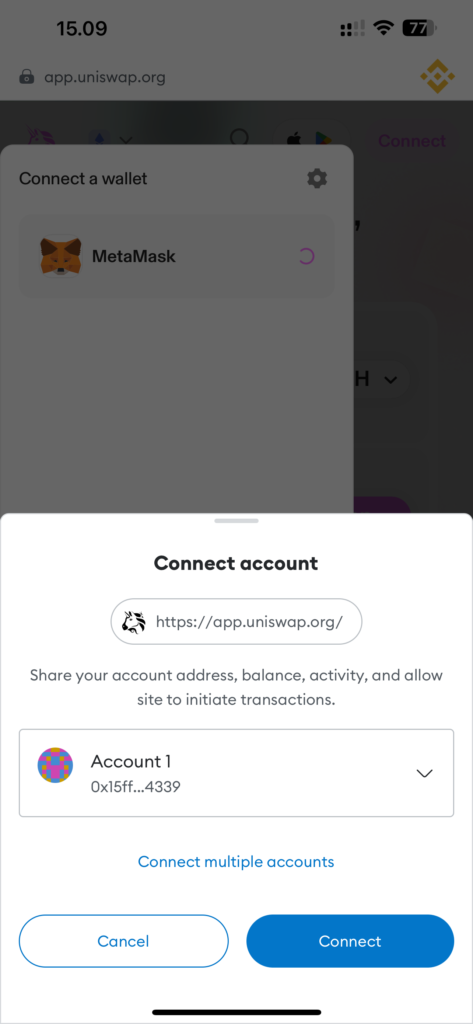
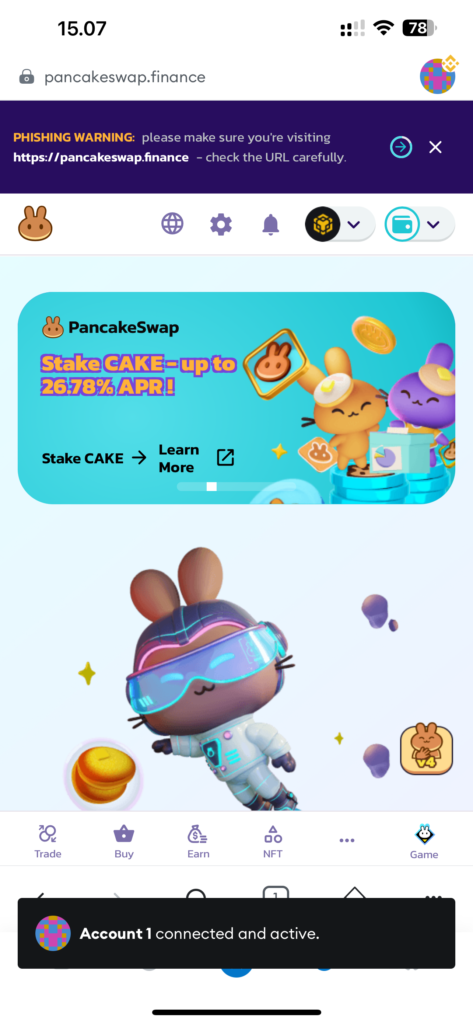
MetaMask will request permission to connect to the site. Verify the request for the correct domain name of the exchange and confirm it. Once connected, the DEX site will display your balance details and the trading options available. You can start trading, swap tokens, participate in liquidity pools, or engage in other activities available on the platform.
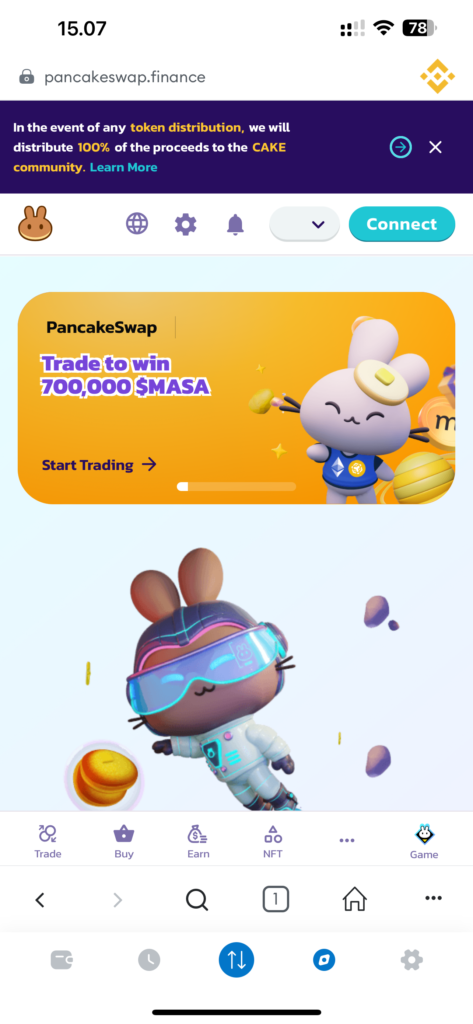
How to Use MetaMask with PancakeSwap.finance
Using MetaMask with PancakeSwap allows users to actively participate in the DeFi ecosystem on the BNB Smart Chain, including trading, adding liquidity, and staking tokens. Here’s how to set up and use MetaMask with PancakeSwap.
Configuring MetaMask for BNB Smart Chain
First, ensure your MetaMask is configured to operate with the Binance Smart Chain, as PancakeSwap operates on this network.
- Add BNB Smart Chain to MetaMask: If you haven’t already, add the BNB Smart Chain to your MetaMask by entering the network details as mentioned in previous instructions.
- Verify Network: Make sure MetaMask is set to the BNB Smart Chain.
Connecting MetaMask to PancakeSwap
Once your wallet is ready for BSC, proceed to the official PancakeSwap website. It is crucial to use a verified site address to avoid phishing attacks.
- Visit PancakeSwap: Navigate to PancakeSwap.finance.
- Connect Wallet: On the homepage, you’ll see an option to connect your wallet. Choose MetaMask as your connection option.
- Authorization Request: MetaMask will ask you to confirm the action by opening a window with an authorization request.
Performing Transactions on PancakeSwap
Once connected, you can access your funds through the PancakeSwap interface to perform exchanges, participate in lotteries, and add funds to liquidity pools.
- Confirm Transactions: For transactions such as exchanges or adding liquidity, MetaMask will request confirmation to execute these transactions. Ensure that you carefully check all parameters before confirming.
- Monitor Transaction Fees: Pay attention to the transaction fees (gas fees), which can vary based on network congestion.
Ensuring Security
Security is critical in this process because transactions are irreversible.
- Double-check Wallet Addresses: Always double-check wallet addresses for sending and receiving tokens, as well as the terms of the transactions to avoid losses or errors.
- Phishing Awareness: Be wary of phishing attempts by ensuring you are always on the official PancakeSwap website.
Interacting with PancakeSwap through MetaMask provides a powerful way to manage your cryptocurrency assets directly through the browser, offering direct and secure access to a wide range of DeFi tools.
MetaMask Wallet Security
The security of the MetaMask wallet depends on measures taken by both users and developers. Here’s a detailed guide on securing your MetaMask wallet effectively.
- Secure Your Seed Phrase: The core element of security is the secret phrase (seed phrase), generated when creating the wallet. This phrase, consisting of 12 or more words, acts as the master key to your funds. It allows wallet recovery on any device and should be stored in a secure, offline location to minimize hacking risks.
- Regular Usage Security: For daily usage, MetaMask requires a password which encrypts your secret phrase locally on your device. This password never leaves your device and serves as the first line of defense. It’s crucial to use a complex and unique password that is difficult to guess.
- Auto-Lock Feature: MetaMask includes an auto-lock feature that logs the user out after a period of inactivity. This prevents unauthorized access if the device is left unattended.
- Beware of Phishing Sites: Be cautious about the sites you interact with through MetaMask. Phishing sites can pose as legitimate decentralized applications (DApps) and request to connect to your wallet. Confirming this connection could inadvertently give attackers access to your funds. Always ensure the URL is legitimate and corresponds to the official site of the application.
- Use of Hardware Wallets:For additional security, MetaMask supports the use of hardware wallets, such as Ledger or Trezor. These devices store your private keys in a physically isolated environment, protecting them from online attacks. Using a hardware wallet with MetaMask significantly enhances security for transactions on blockchain networks.
- Software Updates and Security Notifications: Regularly updating the wallet software and paying attention to security notifications also play a crucial role in securing your assets.
Conclusion
MetaMask is a powerful tool for managing cryptocurrency assets directly from your smartphone. By following these security guidelines, you can set up and use your wallet securely, effectively interacting with decentralized exchanges and applications. Always approach security with diligence at every step of your cryptocurrency interactions.