MetaMask is one of the most popular cryptocurrency wallets that supports various blockchain networks. By default, MetaMask is configured to work only with the Ethereum network. However, if you need to add another network, such as BNB Smart Chain (formerly known as Binance Smart Chain) or Polygon, you can do so manually. In this article, we’ll walk through the steps of adding a new network to MetaMask on your smartphone.
1. Open the MetaMask App
The first step is to open the MetaMask app on your smartphone. Make sure you have already created a wallet and logged into your account.
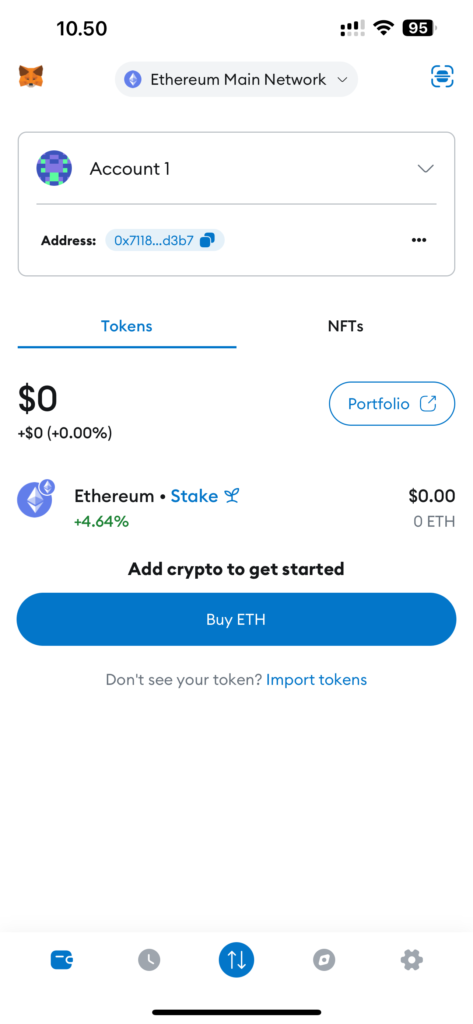
2. Navigate to the Settings Section
To add a new network, you first need to go to the app’s settings section. To do this, tap the settings icon in the bottom right corner of the screen (three horizontal lines) and select “Settings” from the dropdown menu.
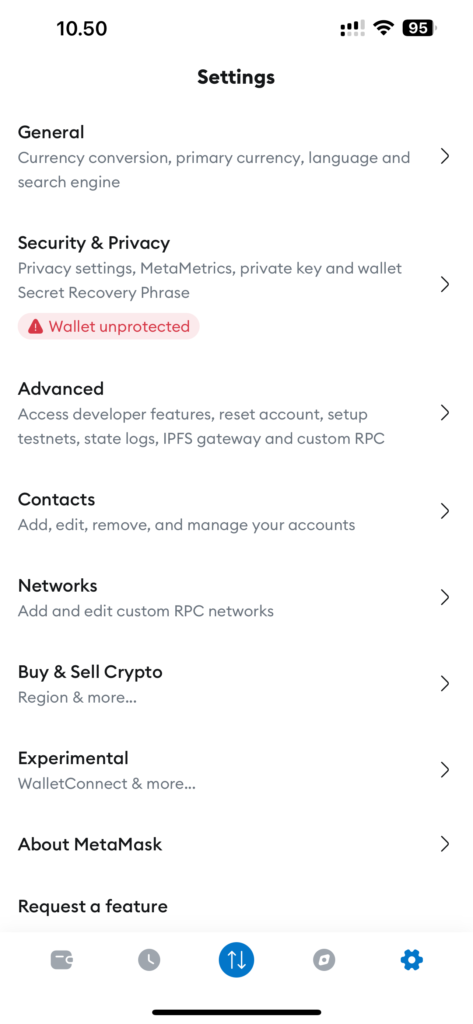
3. Open the “Networks” Section
In the settings menu, find and select the “Networks” option. This section displays all the networks that have already been added to your MetaMask.
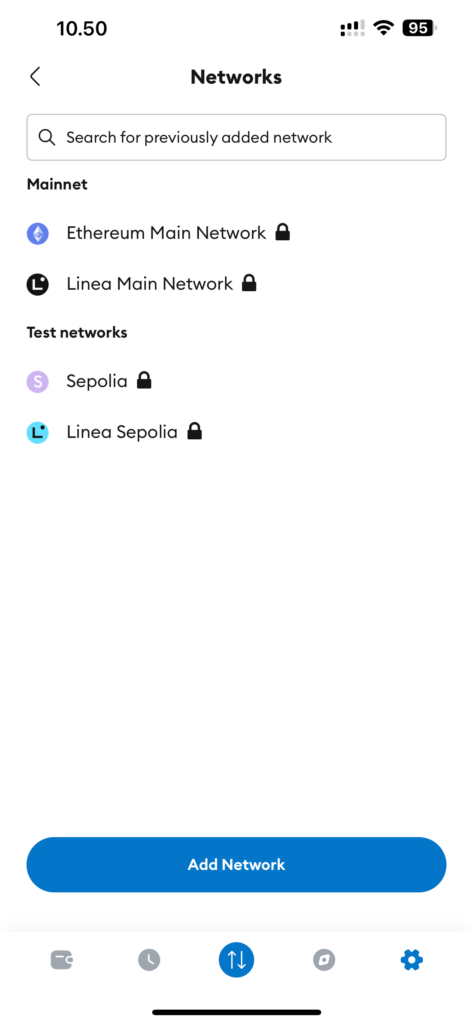
4. Add a New Network
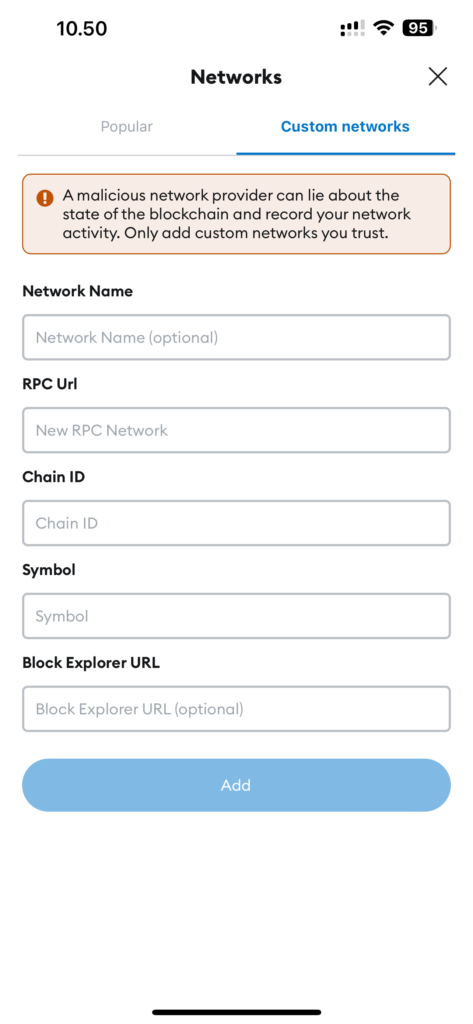
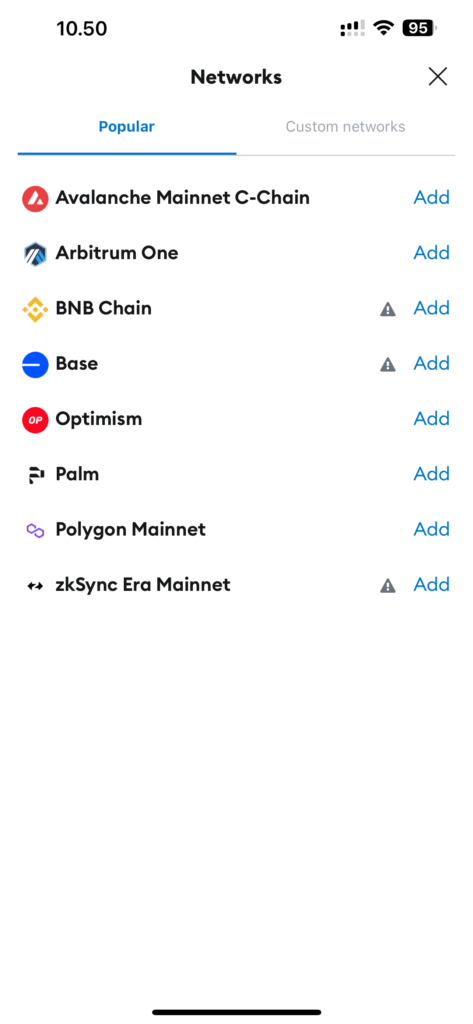
On the “Networks” screen, tap the “Add” button for the desired network or go to the “Custom Networks” tab. You will be prompted to enter the network parameters manually.
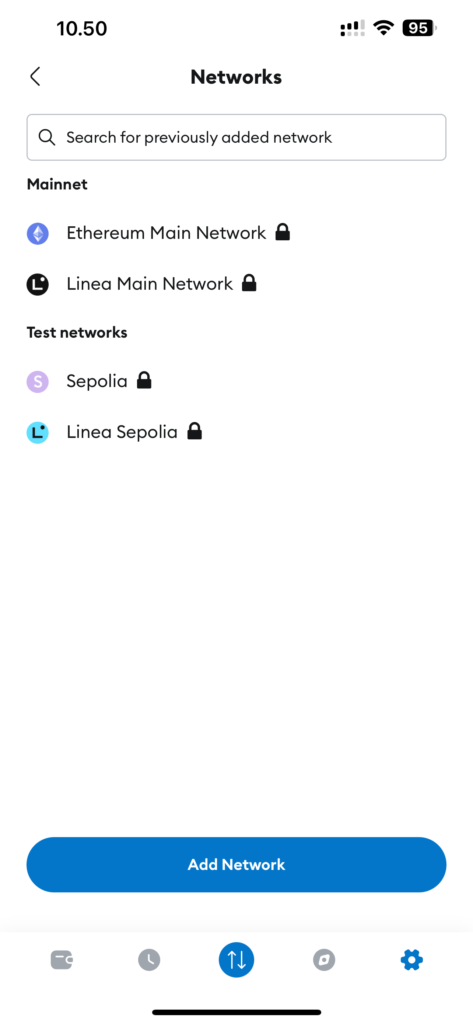
4.1 Enter Network Parameters Manually
If the network you need is not listed, select the “Add Network Manually” option. You will need to enter the following details:
- Network Name: Enter the name of the network, such as “BNB Smart Chain”.
- RPC URL: Enter the RPC URL for connecting to the network’s RPC server. For BNB Smart Chain, it is
https://bsc-dataseed.binance.org/. - Chain ID: Enter the network’s chain ID. For BNB Smart Chain, it is
56. - Currency Symbol: Enter the symbol of the network’s native currency. For BNB Smart Chain, it is
BNB. - Block Explorer URL (optional): Enter the URL of the block explorer, such as
https://bscscan.com/.
4.2 Select a Network from the List
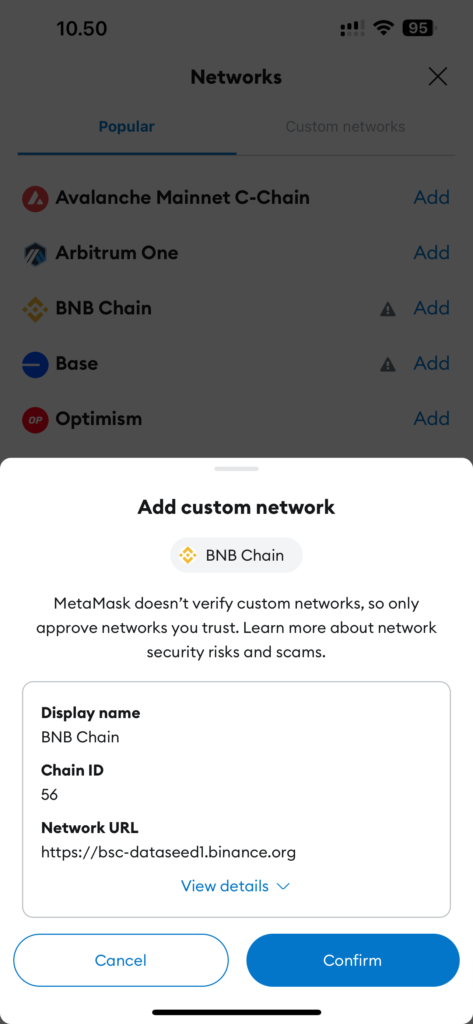
Some popular networks may be displayed in the suggested list. If you see the network you need, simply select it, and the parameters will be filled in automatically.
5. Save the Settings
After entering all the required information, tap “Add” or “Save”. Your new network will be added to the list, and you can switch between networks in your MetaMask.
6. Switching Between Networks
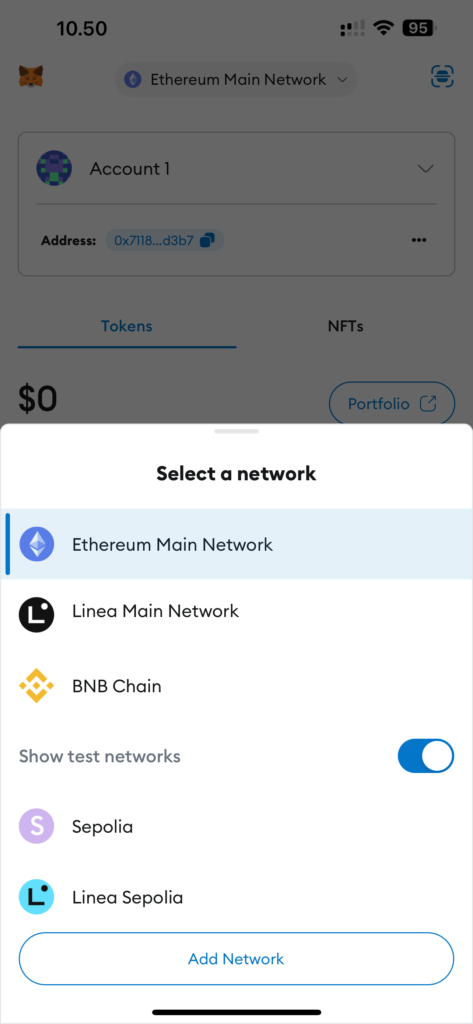
To switch to the new network, open the MetaMask main menu and tap the current network name at the top of the screen. From the dropdown list, select the network you want to use.
Conclusion
Adding a new network to MetaMask on a smartphone is a quick and easy process that allows you to work with different blockchains. By following this guide, you can easily connect to the desired network and take full advantage of its features.


