Arbitrum is a popular Layer 2 solution for Ethereum that reduces costs and accelerates transactions using Rollup technology. It ensures high-speed execution of smart contracts, making it an excellent choice for those looking for faster and more affordable transactions within the Ethereum ecosystem. Adding Arbitrum to your MetaMask allows you to interact with decentralized applications (dApps) running on this platform. Here’s a step-by-step guide on how to do it.
Automatically Adding Arbitrum to MetaMask
MetaMask developers have pre-configured support for many popular networks, including Arbitrum. To add this network automatically:
1. Open MetaMask: Click on the network dropdown menu at the top of the MetaMask interface.
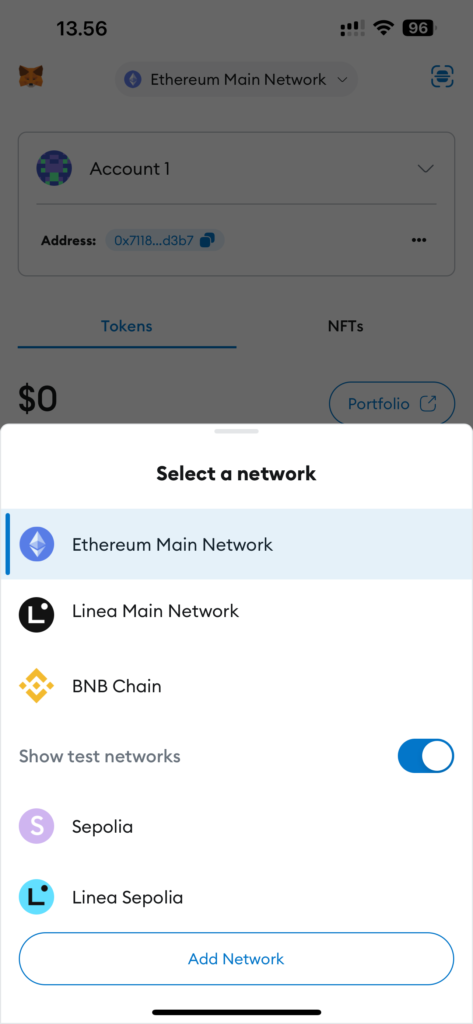
2. Add a Network: From the dropdown, select the option to “Add a Network.”
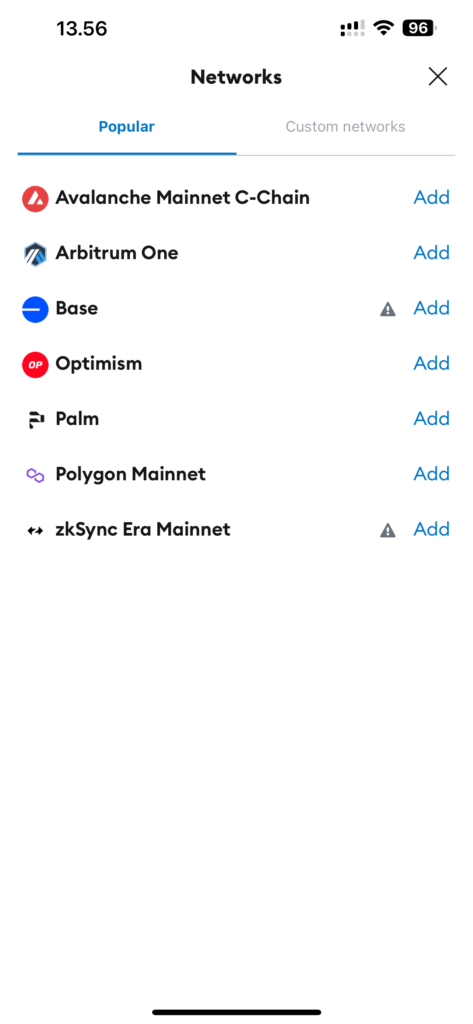
3. Choose Arbitrum: In the list of popular networks that appears, select “Arbitrum One” and confirm the addition.
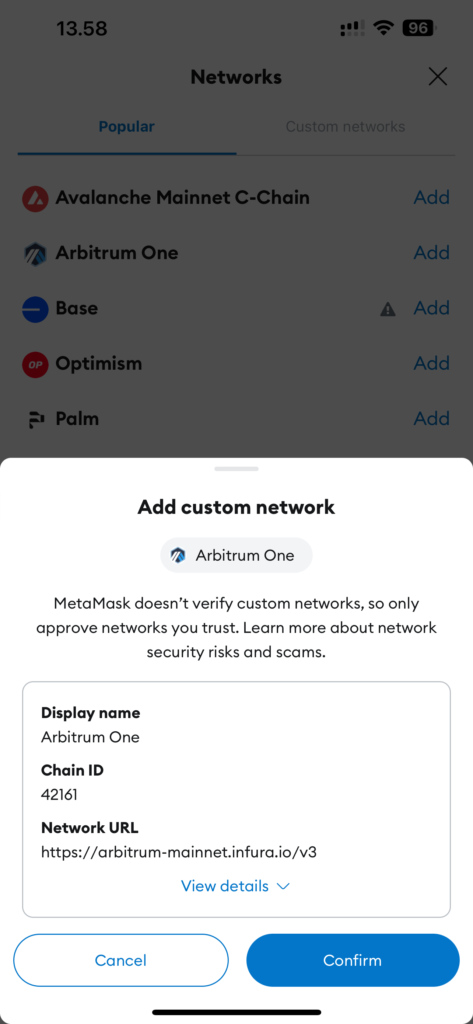
Once added, the Arbitrum network will be available in your MetaMask network list.
Manually Adding Arbitrum to MetaMask
If you prefer to add the Arbitrum network manually, follow these steps:
Step 1: Open the Network Settings
- Open MetaMask and access the network list dropdown.
- Alternatively, navigate to “Settings” and select “Networks” to manage networks.
Step 2: Add a New Network
- Click on “Add Network” within the “Networks” tab. This will open a form for adding a new network.
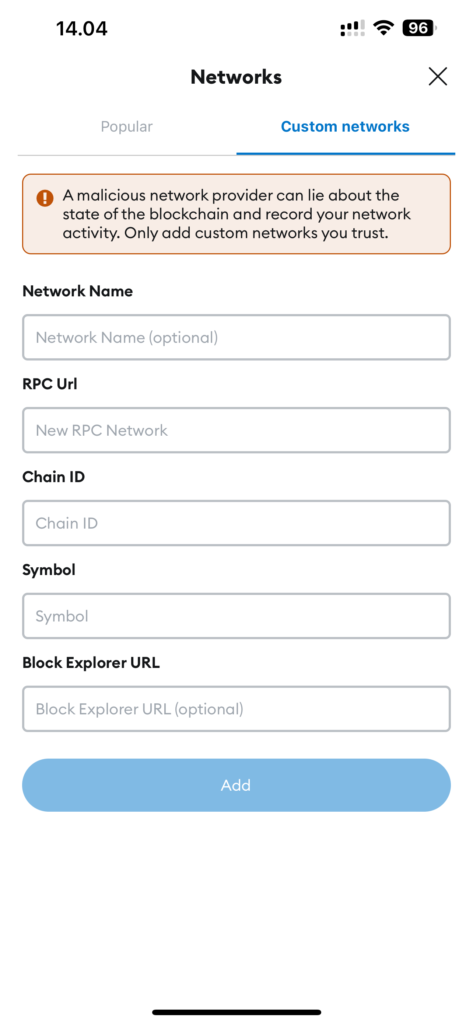
Step 3: Enter Arbitrum Network Details
- Network Name: Arbitrum One
- New RPC URL:
https://arb1.arbitrum.io/rpc - Chain ID: 42161
- Currency Symbol: ETH
- Block Explorer URL:
https://arbiscan.io
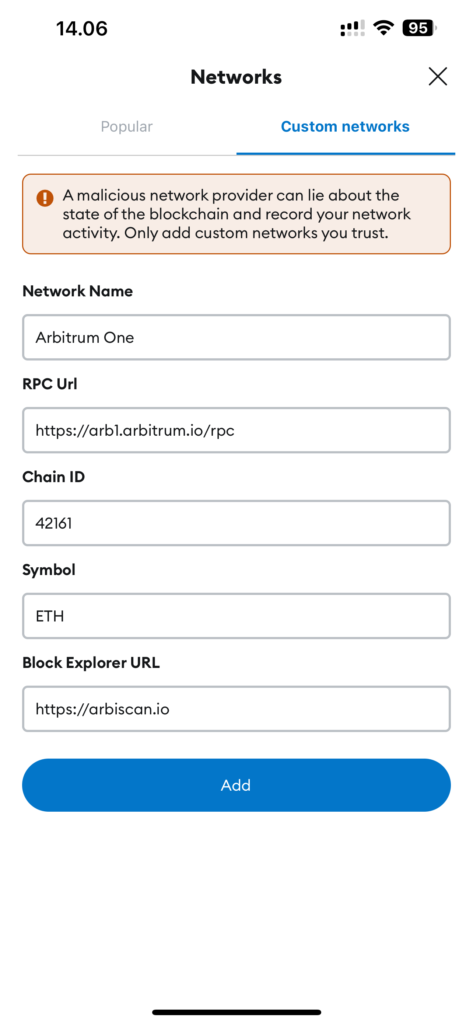
Ensure all details are entered correctly for the network to function properly.
Step 4: Save the Settings
- After entering all the necessary information, click “Save.” Arbitrum One should now appear in your available networks list in MetaMask.
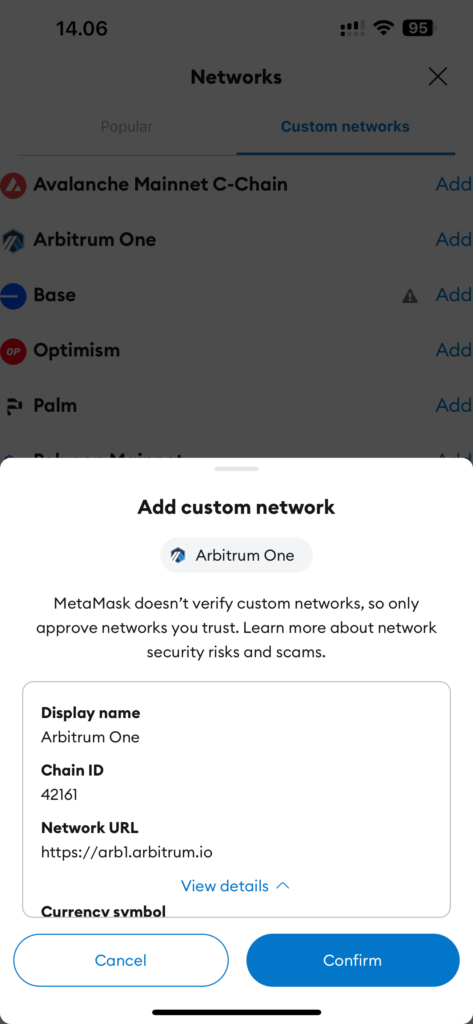
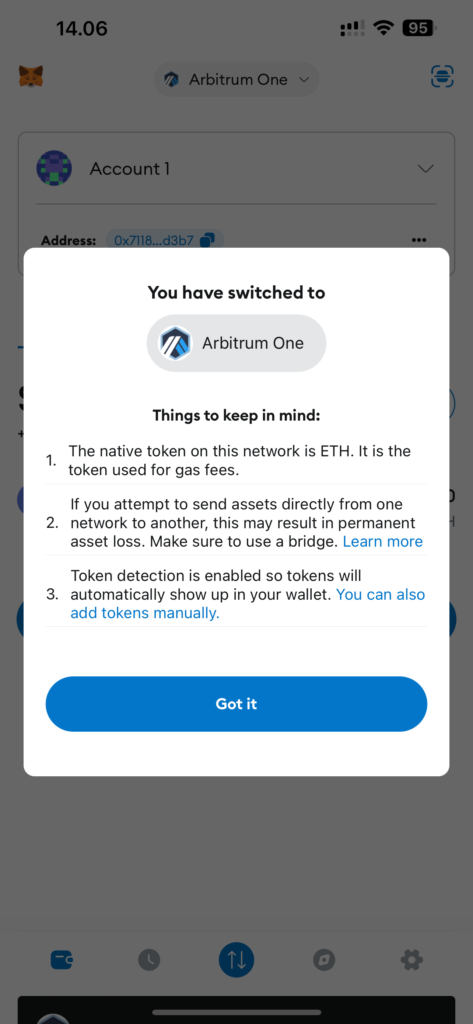
Step 5: Switch to the Arbitrum Network
- To start using Arbitrum, go to the main MetaMask interface, click on the network name (typically Ethereum Mainnet), and select “Arbitrum One” from the list.
Using the Arbitrum Network
Now that you’re connected to Arbitrum One, you can begin sending and receiving transactions, participating in DeFi projects, using dApps, and more, all with lower fees and faster transaction times.
How Arbitrum Fees Work
Arbitrum reduces fees for end-users by shifting most of the computation and storage work off the Ethereum mainnet. Arbitrum’s fees consist of several components:
- Transaction Fee: This is the cost for processing individual transactions on Arbitrum. Typically, these fees are significantly lower than on the Ethereum mainnet, thanks to efficient data and computation management.
- Data Storage Fee: Since all transaction data must be available for potential verification, there is a small fee for data storage, optimized to keep overall costs low.
- Confirmation Fee: In Arbitrum, transactions are confirmed through an Optimistic Rollup approach, which includes a challenge period for potential disputes. Although this process involves extra checks, the overall confirmation costs remain low due to the system’s efficiency.
Paying Fees on Arbitrum
Fees on Arbitrum are paid in Ether (ETH), the primary currency for interacting with Ethereum and its Layer 2 solutions. To execute transactions on Arbitrum, you need to have a sufficient ETH balance in your MetaMask wallet or another wallet that supports Arbitrum.
Why Arbitrum Is Beneficial
Using Arbitrum can significantly reduce transaction costs, especially during periods of high network congestion on Ethereum, where gas fees can be substantial. This makes Arbitrum an attractive option for those who regularly interact with decentralized applications, particularly in DeFi and NFT spaces, where saving on fees can have a considerable impact.
Conclusion
Arbitrum offers a powerful solution for reducing fees and accelerating transactions without compromising on security and decentralization. Understanding the fee structure in Arbitrum helps users better plan their transactions and maximize the benefits this Layer 2 solution provides.


